Battery switch on travel trailer function is crucial for managing your RV’s power. Understanding how your battery switch works – whether it’s a single, dual, or selector switch – is key to avoiding electrical issues and ensuring a smooth camping experience. This guide breaks down everything you need to know, from safely connecting your batteries to troubleshooting common problems and performing essential maintenance.
We’ll explore the different types of switches, their pros and cons, and how to connect and disconnect your batteries safely. We’ll also cover diagnosing problems, managing power distribution, and even upgrading your switch if needed. By the end, you’ll be confident in handling your travel trailer’s electrical system.
Battery Switch Types in Travel Trailers
Choosing the right battery switch for your travel trailer is crucial for managing your power sources effectively and preventing potential electrical problems. Understanding the different types available will help you make an informed decision based on your specific needs and setup. This section will Artikel the common types of battery switches and their characteristics.
Single Battery Switches
A single battery switch is the simplest type, designed for a single battery setup. It’s essentially an on/off switch controlling the power flow from your battery to the trailer’s electrical system. This is suitable for trailers with a single 12V battery and minimal power demands. The advantage is its simplicity and low cost. However, it lacks the flexibility to manage multiple batteries or isolate the house battery from the chassis battery (if present).
It’s a straightforward solution, but its limitations become apparent with more complex electrical systems.
Dual Battery Switches
Dual battery switches are designed to manage two batteries, typically a house battery and a chassis battery (used for starting the vehicle). These switches usually offer three positions: “Both” (connecting both batteries), “House” (connecting only the house battery), and “Off” (disconnecting both batteries). The advantage is the ability to isolate the house battery to prevent draining the starting battery, and to charge both batteries independently.
The disadvantage is that it still only allows for two batteries; if you need more, you’ll need a different solution.
Selector Switches
Selector switches provide more control over multiple batteries. These switches often have several positions, allowing you to select which battery or combination of batteries to power your trailer’s systems. Some can even accommodate three or more batteries. This offers greater flexibility in managing power, allowing for charging different batteries independently and ensuring you always have a backup power source.
However, they are more complex and generally more expensive than simpler switches. A potential disadvantage is the increased complexity which can be challenging for those unfamiliar with electrical systems.
Comparison Table of Battery Switch Types
| Switch Type | Number of Batteries | Advantages | Disadvantages |
|---|---|---|---|
| Single | 1 | Simple, inexpensive | Limited functionality, only suitable for single battery systems |
| Dual | 2 | Isolates house and chassis batteries, allows independent charging | Limited to two batteries |
| Selector | 2 or more | Greater flexibility in managing multiple batteries, independent charging options | More complex, expensive |
Troubleshooting Battery Switch Issues
Your travel trailer’s battery switch is a critical component, ensuring you have power when you need it. Problems with this switch can leave you stranded without lights, refrigeration, or other essential systems. Understanding common issues and how to troubleshoot them can save you time, frustration, and potentially costly repairs.Troubleshooting battery switch problems often involves a systematic approach, checking the simplest components first before moving on to more complex diagnostics.
This usually starts with a visual inspection and progresses to using a multimeter for more precise measurements.
Faulty Switches
A faulty switch itself is a common culprit. This could manifest as the switch failing to turn on, turning on intermittently, or becoming stuck in the “on” position. Visual inspection should reveal obvious signs of damage, such as cracks, burn marks, or loose connections. If the switch appears fine externally, further testing is necessary. A multimeter can check for continuity – a complete circuit – across the switch terminals when it’s in the “on” position.
Lack of continuity indicates a faulty switch, requiring replacement.
Corroded Terminals
Corrosion on the battery terminals and switch terminals is another frequent problem. Corrosion creates resistance, hindering the flow of electricity and potentially causing the switch to malfunction or even overheat. This is often visible as a white, green, or blue powdery substance on the metal contacts. Cleaning the terminals with a wire brush and a battery terminal cleaner is the usual solution.
Apply a corrosion inhibitor afterward to prevent future buildup. After cleaning, retest the system to ensure proper function.
Blown Fuses
A blown fuse is a protective measure, indicating a short circuit or excessive current draw somewhere in the system. Check the fuse(s) associated with the battery switch; these are usually located near the switch itself or in a fuse box. A blown fuse will appear visibly broken, with a burned-through filament. Replace the fuse with one of the same amperage rating.
If the new fuse blows immediately after replacement, there’s a short circuit in the system that needs to be addressed before continuing. Ignoring this can lead to further damage.
Multimeter Testing Procedures
Using a multimeter is crucial for accurate diagnosis. To check for continuity, set the multimeter to the continuity setting (often symbolized by a diode or a continuity symbol). Touch the multimeter probes to the appropriate terminals of the switch. A continuous tone or reading indicates a closed circuit, while no tone or an open circuit reading suggests a problem within the switch itself or its wiring.
To check voltage, set the multimeter to the DC voltage setting. Measure the voltage at the battery terminals and at the output terminals of the switch. A significant voltage drop indicates a problem with the switch, wiring, or terminals. Remember to always disconnect the negative battery terminal before performing any tests.
Battery Switch and Power Management
Your travel trailer’s battery switch is the central control for your DC power system. It’s more than just an on/off switch; it’s the gatekeeper, determining which components receive power from your house batteries and, critically, when that power flows. Understanding its function is key to avoiding electrical issues and maximizing your off-grid capabilities.The battery switch acts as the main disconnect for your house batteries, preventing accidental drain or short circuits.
When the switch is in the “off” position, it completely isolates the batteries from the rest of the trailer’s electrical system. This is crucial for safety and for preventing battery drain when the trailer is stored for extended periods. In the “on” position, it allows power to flow from your batteries to various DC appliances like lights, water pumps, and the refrigerator (if it runs on DC).
The interaction with other electrical components is equally important.
Battery Switch Interaction with Other Components
The battery switch isn’t an isolated component; it’s a critical part of a larger electrical network. For example, your inverter relies on the battery switch to access power from the house batteries. With the switch “off,” the inverter will have no power source and won’t be able to convert DC power to AC power for your household appliances. Similarly, a solar panel charging system needs the battery switch to “on” to charge the house batteries.
If the switch is off, the solar panels won’t be able to replenish the battery charge. Essentially, the battery switch acts as a master control, enabling or disabling the flow of DC power to these crucial components.
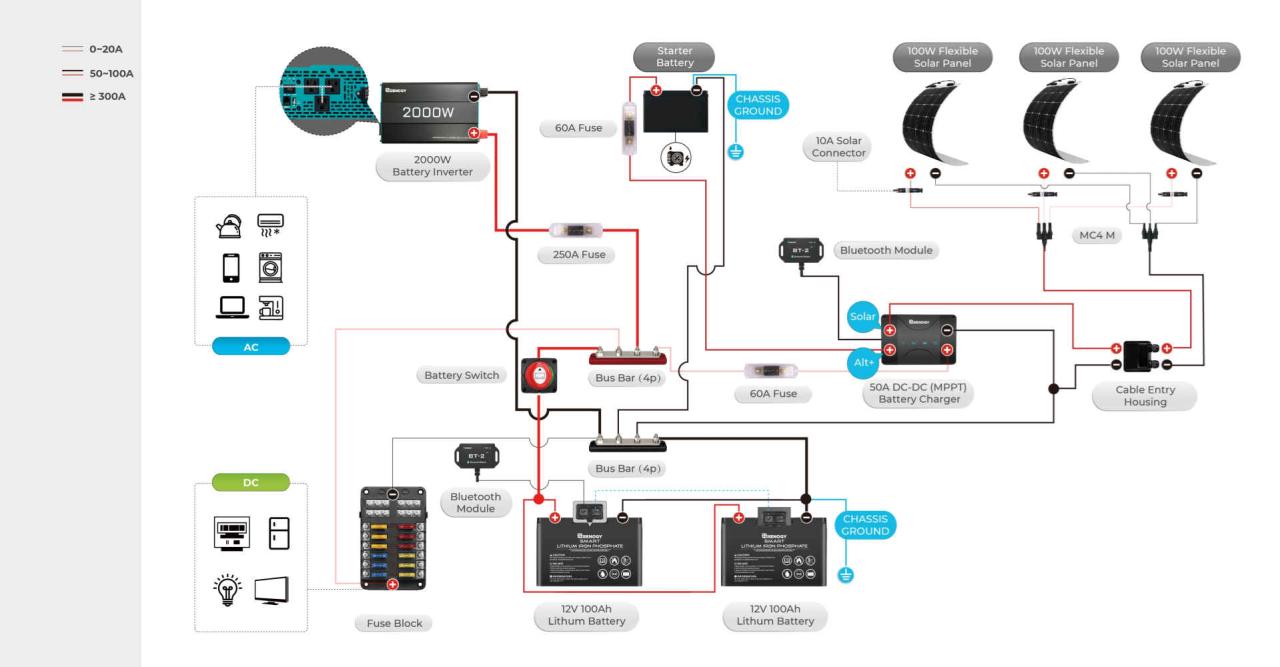
Diagram of a Typical Travel Trailer Electrical System
Imagine a simple diagram. We’ll start with the house batteries, represented by two parallel battery symbols (+ and – terminals). From the positive (+) terminal of the batteries, a thick wire runs directly to the battery switch. This switch is depicted as a simple switch symbol with an “ON” and “OFF” position clearly labeled. From the output side of the switch (when “ON”), another thick wire branches off to a distribution panel.
This panel acts as a central hub, distributing power to various DC circuits in the trailer. These circuits are represented by smaller lines leading to symbols representing lights, water pumps, and other DC appliances.Another branch from the battery switch’s output (when “ON”) connects to the inverter. The inverter is represented by a box with input (DC) and output (AC) terminals.
So, you’re planning a trip? Awesome! First things first: get yourself sorted with travel insurance. Check out Aon travel insurance for some solid options; peace of mind is priceless, right? Then, if you’re an audiophile like me, don’t forget your tunes! Seriously consider setting up an audiophile travel setup beforehand – good headphones and a portable DAC can make a huge difference in enjoying your journey.
Happy travels!
The AC output of the inverter then feeds into the AC distribution panel, which in turn supplies power to your AC appliances. Finally, a separate wire connects to the solar charge controller. This controller is represented by a box with input (from the solar panels) and output (to the batteries) terminals. The solar charge controller regulates the flow of power from the solar panels to the batteries, ensuring they are charged safely and efficiently.
The entire system is grounded, represented by a ground symbol connected to the chassis of the trailer. This grounding ensures safety and prevents electrical shocks. This visual representation clearly illustrates how the battery switch controls the flow of DC power, affecting the operation of all connected components.
Battery Switch Maintenance and Safety: Battery Switch On Travel Trailer Function
Keeping your travel trailer’s battery switch in top condition is crucial for reliable power and preventing potential hazards. Regular maintenance ensures a longer lifespan for both the switch and your batteries, minimizing the risk of electrical problems on the road. This section details a maintenance schedule and important safety precautions.Regular inspections and cleaning are key to preventing problems before they arise.
Ignoring maintenance can lead to corrosion, poor connections, and ultimately, switch failure. This can leave you stranded without power, especially inconvenient when far from civilization.
Battery Switch Inspection and Cleaning Schedule
A simple visual inspection and cleaning should be part of your pre-trip checklist and performed at least every three months or before and after each extended trip. More frequent checks might be needed in humid or corrosive environments.
- Monthly Inspection: Visually check the switch for any signs of corrosion, loose connections, or damage to the wiring. Look for any discoloration, buildup of white powder (corrosion), or signs of overheating (burnt or discolored plastic).
- Every Three Months: Disconnect the battery switch and use a wire brush or sandpaper to clean the terminals and connections. Apply a corrosion inhibitor or dielectric grease to the cleaned terminals to prevent future corrosion. Tighten all connections securely.
- Annually: Perform a more thorough inspection, checking for any signs of internal damage or wear. If you notice any irregularities, consult a qualified RV technician.
Safety Precautions When Working with Batteries and Electrical Systems
Working with batteries and electrical systems requires caution. Improper handling can lead to serious injury or damage. Always prioritize safety.
- Wear Protective Gear: Always wear safety glasses to protect your eyes from sparks or acid splashes. Gloves are also recommended to protect your hands from corrosion and potential acid burns.
- Disconnect the Battery: Before working on any part of the electrical system, always disconnect the negative (-) battery terminal first. This prevents accidental shorts and shocks.
- Proper Ventilation: Batteries release hydrogen gas, which is flammable and explosive. Ensure adequate ventilation when working near batteries, and avoid sparks or flames.
- Neutralize Acid Spills: If battery acid spills, neutralize it immediately with baking soda and water. Wear appropriate protective gear and follow safety guidelines for handling acid spills.
- Consult a Professional: If you are uncomfortable performing any of these tasks, consult a qualified RV technician or electrician.
Tips for Extending the Lifespan of Battery Switches and Batteries
By following a few simple tips, you can significantly extend the lifespan of your battery switch and batteries.
- Use a Battery Disconnect Switch: A properly installed and maintained battery disconnect switch helps prevent parasitic drain on your batteries when the trailer is not in use. This keeps your batteries charged and ready for your next adventure.
- Regular Charging: Keep your batteries properly charged to prevent sulfation, a condition that reduces battery capacity and lifespan. Use a battery charger appropriate for your battery type.
- Keep Batteries Clean and Dry: Regularly clean the battery terminals and keep the battery area dry to prevent corrosion. Corrosion can lead to poor connections and reduced battery performance.
- Proper Storage: When storing your travel trailer for extended periods, disconnect the batteries and store them in a cool, dry place. Consider using a trickle charger to maintain a charge during storage.
Upgrading or Replacing a Battery Switch
Upgrading or replacing your travel trailer’s battery switch is a relatively straightforward process that can significantly improve your RV’s electrical system reliability and safety. A faulty switch can lead to power failures, battery drain, and even fire hazards. Choosing the right replacement and performing the installation correctly are crucial steps.Replacing your battery switch involves disconnecting the existing switch, installing the new one, and reconnecting the wiring.
This process requires some basic electrical knowledge and careful attention to detail. Incorrect wiring can cause serious damage to your electrical system or even personal injury.
Selecting a Replacement Battery Switch
The selection of a replacement battery switch depends heavily on your trailer’s power demands. Consider the amperage rating of your batteries and appliances. You’ll want a switch with an amperage rating that exceeds the maximum current draw of your system to prevent overheating and failure. For example, if your system draws a maximum of 100 amps, you’ll want a switch rated for at least 150 amps to provide a safety margin.
Also consider features like multiple battery banks (if you have them), integrated circuit breakers, and remote switching capabilities. These can enhance convenience and safety.
Tools and Materials Needed
Before beginning, gather all necessary tools and materials. Having everything prepared beforehand will make the process much smoother and safer.
- New battery switch (with appropriate amperage rating)
- Wrench or socket set (to match the existing switch’s mounting hardware)
- Screwdrivers (Phillips and flathead, as needed)
- Wire strippers/cutters
- Crimping tool (if using crimp connectors)
- Electrical tape
- Wire connectors (butt connectors or ring terminals)
- Multimeter (to verify power is disconnected)
- Safety glasses
- Gloves
Disconnecting the Old Battery Switch
Before starting any work, always disconnect the negative battery cable from your battery. This is a crucial safety precaution to prevent accidental shocks or short circuits. Use your multimeter to verify that power is completely disconnected from the system before proceeding. Next, carefully remove the old battery switch, noting the wiring configuration. Take pictures or make a detailed diagram of how the wires are connected.
This will be crucial when installing the new switch. Carefully label each wire to avoid confusion.
So, you’re planning a trip? Awesome! First things first: get yourself sorted with travel insurance. Check out Aon travel insurance for some solid options; they’ve got you covered. Then, if you’re an audiophile like me, don’t forget your tunes! Planning your audiophile travel setup beforehand will ensure your listening experience on the go is top-notch.
Happy travels!
Installing the New Battery Switch
Once the old switch is removed, carefully install the new switch in its place, ensuring it’s securely mounted. Use the diagram or pictures you created to connect the wires correctly to the new switch’s terminals. Make sure all connections are secure and properly insulated with electrical tape. After making all the connections, reconnect the negative battery cable.
Test the new switch to verify that it functions correctly and that all circuits are working as expected. Use your multimeter to check for proper voltage at each circuit.
Battery Switch and Battery Types
Choosing the right battery switch for your travel trailer is crucial, but it’s equally important to understand how that switch interacts with the type of battery you’re using. Different batteries have different voltage outputs, charging characteristics, and sensitivities, all of which impact the functionality and longevity of your system. Ignoring these differences can lead to premature battery failure, inefficient power management, and even safety hazards.The interaction between battery type and switch configuration is complex.
Essentially, the switch acts as a gatekeeper, controlling the flow of power from your batteries to your trailer’s electrical system. The battery, however, dictates the voltage and current it can safely supply, and the switch needs to be compatible to handle these parameters without damage or malfunction.
Lead-Acid Battery Systems and Switch Compatibility
Lead-acid batteries, the traditional choice for RVs, come in flooded, gel cell, and AGM (Absorbent Glass Mat) varieties. Flooded lead-acids are generally the least expensive but require more maintenance. Gel cells and AGMs are more robust and require less maintenance but cost more. All three types typically operate at 12 volts. A standard battery switch designed for 12-volt lead-acid batteries will work fine.
However, higher amperage draws (e.g., from air conditioners or microwaves) might require a higher-rated switch capable of handling the increased current flow. Using a switch with an amperage rating lower than what the battery and appliances demand could lead to overheating and potential fire hazards.
Lithium Battery Systems and Switch Compatibility, Battery switch on travel trailer function
Lithium batteries are becoming increasingly popular due to their higher energy density, longer lifespan, and faster charging times. However, they operate differently than lead-acid batteries and require specialized consideration. While still often at 12 volts, lithium batteries can deliver higher currents and have different charging profiles. A standard lead-acid battery switch may be adequate for lower-current applications, but for higher-demand systems, a switch specifically designed for lithium batteries is recommended.
These switches often incorporate features like battery management system (BMS) integration or higher amperage ratings to safely handle the lithium battery’s characteristics. Using a standard switch with a lithium battery might not adequately protect the battery from overcharging or discharging, potentially damaging or shortening its lifespan.
Impact of Mismatched Battery and Switch Configurations
Using an incompatible battery switch can have several negative consequences. For example, a low-amperage switch used with a high-demand lithium battery system could overheat, potentially causing a fire. Conversely, using a switch designed for a lead-acid battery with a lithium battery might not offer the necessary protection for the lithium battery’s unique charging characteristics, leading to premature battery degradation or even failure.
In a scenario with a flooded lead-acid battery and a switch rated for much lower amperage, you might experience frequent tripping of the switch, indicating that the current draw exceeds the switch’s capacity. This would interrupt power to the trailer’s systems, making appliances unusable and potentially leading to damage. The resulting disruption to power would greatly affect the user experience.
Mastering your travel trailer’s battery switch isn’t just about keeping the lights on; it’s about ensuring safe and reliable power for all your onboard systems. From understanding the various switch types and their functionalities to performing basic maintenance and troubleshooting, this guide equips you with the knowledge to confidently manage your RV’s electrical system. Remember to always prioritize safety when working with batteries and electricity.
Happy travels!
Question Bank
What size fuses should I use with my battery switch?
The correct fuse size depends on the amperage rating of your battery switch and wiring. Consult your owner’s manual or a qualified electrician for the appropriate size.
How often should I clean my battery terminals?
Clean your battery terminals at least twice a year, or more often if you notice corrosion.
Can I use a lithium battery with any battery switch?
No, some battery switches aren’t compatible with lithium batteries. Check the switch’s specifications to ensure compatibility.
My battery switch is making clicking noises. What’s wrong?
Clicking noises often indicate a faulty switch, loose connections, or low battery voltage. Inspect connections and test the switch with a multimeter.
